TodoListApp – Part 4

Reading Time: 4 minutes
 

In this tutorial, we’re going to create an Android application to which will use the REST API we created in the previous tutorial. In this tutorial we’re going to add the following components

  1. Google Sign-in.
  2. Add a list screen to our Android app. 
  3. Adding a list add / get api to our REST code.

The code for this tutorial is located at the following repositories,

Configuring a Google Project

Before we begin to code there’s somethings we need to take care of first. To make Google Sign-in working in your app, first we need to tell google about our app and need to create an OAuth token. If you already know how to do this you can skip this section.

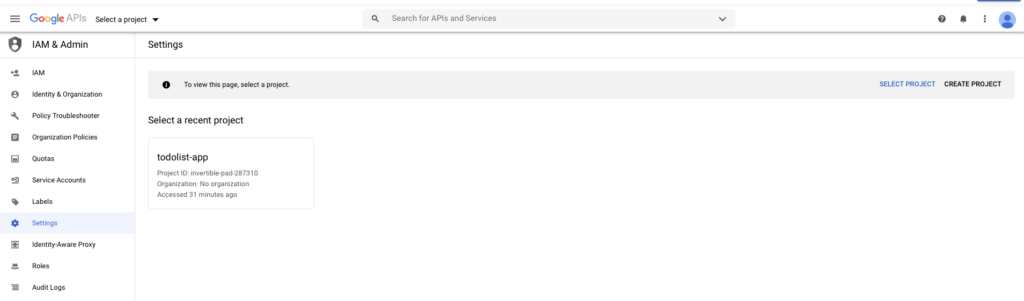
Step 1 – Create a project

Head over to Google Developer Console and initialise your account there. Then create a new project as shown below

Create a Google Console Project

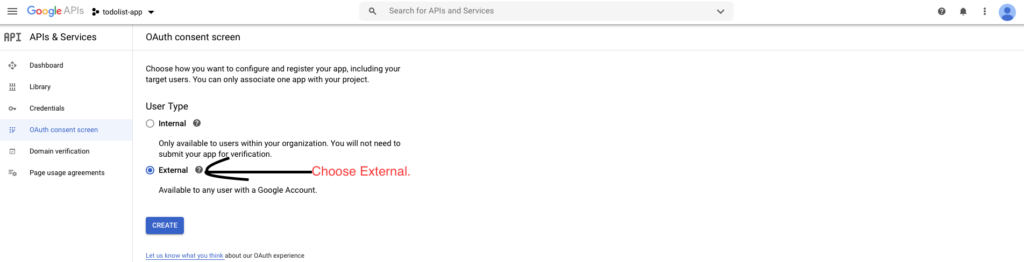
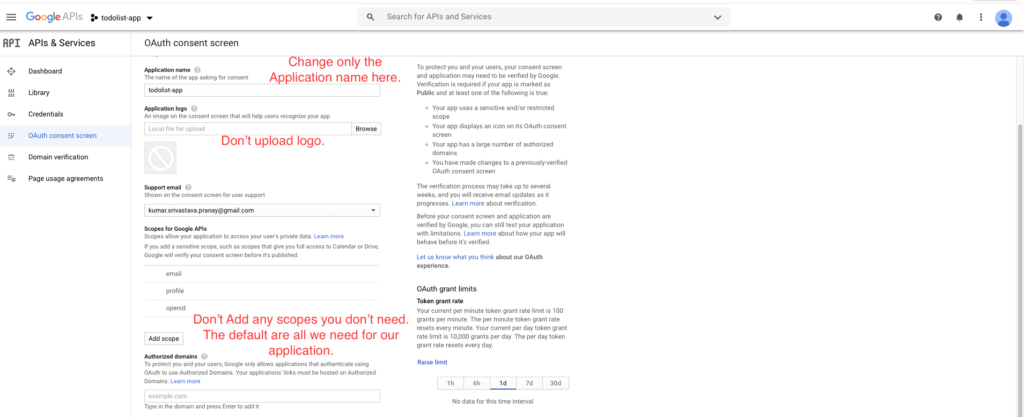
Step 2 – Configure OAuth Consent Screen

This is pretty much the thing that can break your integration! We want anyone with a google account to be able to sign-in thus Google scrutinises this very carefully. The way to make sure you don’t mess this up,

  1. DON’T ask for scopes you don’t need. We just need a user to be authenticated by google nothing else thus the default scopes are just fine.
  2. DON’T change the logo or your app will go  in the verification stage.

The image below shows this,

Create OAuth Consent Screen
OAuth Consent Screen for app

Step 2b – Complete OAuth Configuration

OAuth Consent Screen Configuration.

Make sure you’ve the Save button enabled instead of Submit for verification otherwise you won’t be able to use your app right away.

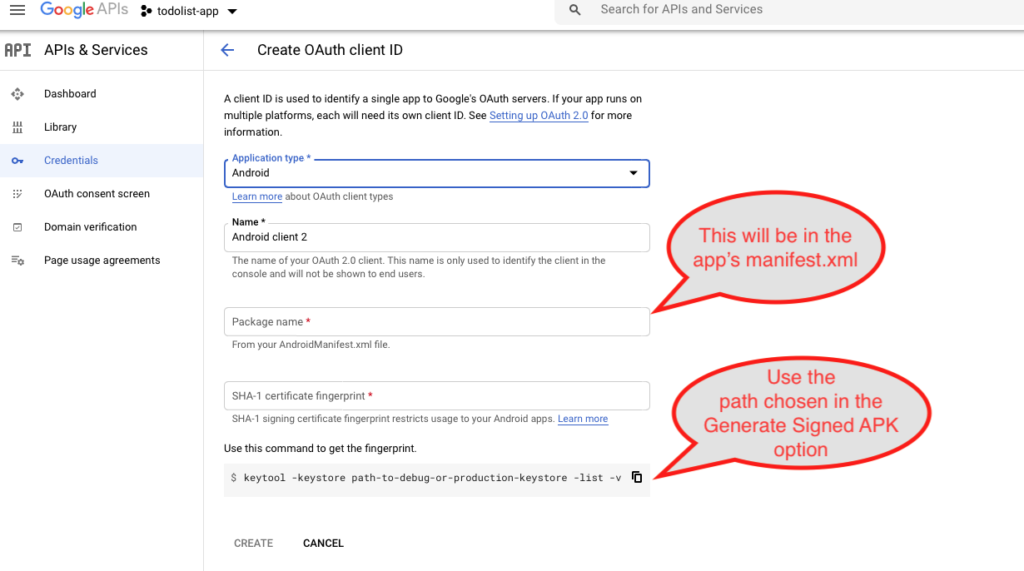
Adding OAuth Credentials

This is perhaps the most important step however you’ll need to do for app to work

  1. In the Credentials click on Create  New Credentials and choose OAuth.
  2. Add the details as follows.
  3. Create a new keystore and add a new certificate in it. The easiest way to do this is to Generate Signed APK from the Build menu of Android Studio. Choose APK instead of Android App Bundle.

You’ll have to remember the path / passwords as these would be required later.  Once this is done, run the key tool command as shown and fill out that form. Check below for more details.

OAuth Configuration
OAuth Client Configuration

Create the Android App (Windup)

We’ll currently have two screens for our app. Now is a good time to name it, let’s call it  Windup. Once a user has logged in successfully we’ll land the user to the listing page where she/he can create and view the item.

In this tutorial we’ll only be adding the login functionality and verification functionality in case someone actually uses Google SignIn. This is what we would need to do

  • Provide a way to login using either registered email or using Google SignIn.
  • Provide a registration screen. (TODO)
  • If a user signs in using Google Sign in then verify the identity using our REST API and register that user in case she/he hasn’t registered yet.

Windup’s Code can be downloaded from here . Please use tag v1.0 to follow along with this tutorial. Note you’ll have to do some changes though to make it work,

  1. Some client secret files and keystone used are not included in the code.
  2. Add a file named keystore.details containing the keystore and key-alias details at the top level of project.
  3. Add the Web-Client ID generated in the Configuration of OAuth.

Rest API Code

The REST API code is present at https://github.com/pranjas/todolist.git. Please use the tag login_with_tpa to follow along with this tutorial.

func GetGoogleClaims(tokenString string) (*GoogleClaim, error) {
	googleClaim := GoogleClaim{}
	googleToken.Lock()
	defer googleToken.Unlock()
check_again:
	if googleToken.certs == nil || len(googleToken.certs) == 0 {
		resp, err := http.Get(googleCertificateURL)
		if err != nil {
			log.Printf("Error connecting to %s", googleCertificateURL)
			return nil, err
		}
		defer resp.Body.Close()
		bytes, err := ioutil.ReadAll(resp.Body)
		if err != nil {
			log.Printf("Error reading from %s", googleCertificateURL)
			return nil, err
		}
		err = json.Unmarshal(bytes, &googleToken.certs)
		if err != nil {
			log.Printf("Unable to unmarshal from %s", googleCertificateURL)
			return nil, err
		}
		for _, value := range resp.Header.Values("Cache-Control") {
			if strings.Contains(value, "max-age") {
				allValues := strings.Split(value, ",")
				var maxAgeVal string
				for _, val := range allValues {
					if strings.Contains(val, "max-age") {
						maxAgeVal = val
						break
					}
				}
				val, err := strconv.ParseInt(strings.Split(maxAgeVal, "=")[1], 10, 64)
				if err != nil {
					val = 0
				}
				log.Printf("Setting google's cert timeout value to %d seconds\n", val)
				googleToken.timeout = time.Now().Unix() + val
			}
		}
	} else if googleToken.timeout <= time.Now().Unix() {
		googleToken.certs = nil
		goto check_again
	}
	//ParseWithClaims requires either a signing key or
	//the public key. Since we're using the PEM format
	//the public key needs to be extraced from the certificate
	//presented by google.
	token, err := jwt.ParseWithClaims(tokenString, &googleClaim,
		func(token *jwt.Token) (interface{}, error) {
			var publicCert string
			if _, ok := token.Method.(*jwt.SigningMethodRSA); !ok {
				return nil, fmt.Errorf("unexpected signing method %v", token.Header["alg"])
			}
			//Get the public key from the certificate
			//which signed this token. Which certificate
			//to use is identified by the "kid" field in
			//token. (kid = key identifier)
			publicCert = googleToken.certs[token.Header["kid"].(string)].(string)
			publicKey, err := jwt.ParseRSAPublicKeyFromPEM([]byte(publicCert))
			if err != nil {
				log.Printf("Not a valid RSA Key %s\n", publicCert)
				return nil, errors.New("Invalid RSA key found")
			}
			return publicKey, nil
		})
	if err != nil {
		log.Printf("error parsing %v\n", err)
		log.Printf("token = %v\n", token)
		return nil, errors.New("Invalid google token")
	}
	if claims, ok := token.Claims.(*GoogleClaim); ok && token.Valid {
		log.Printf("Claims are valid %v", claims)
		return &googleClaim, nil
	}
	return nil, errors.New("Invalid google token")
} 

The above function is pretty straight forward but still let me write down what it does,

  1. Check if we already have a valid cached copy of the Google’s Certificate(s) used to sign this token.
  2. If not, then fetch the public certificate used by Google to sign this token ID.
  3. Find out the “kid” field in the token received and use that kid to index into the certificates we’ve.
  4. Try to Parse / Validate the token with the certificate indexed by the key “kid”.

Since this would be called multiple times, we would rather check on the “max-age” instead of Certs to ascertain if our cache copy is valid. This is to minimise the duration of mutex.

Demo

Leave a Reply